
Tricks for Taking GoPro Photos Like a Pro
In recent years, the GoPro camera has become an absolute must-have and one of the best action cameras on the market. It’s the darling camera of extreme sports photographers, but it’s becoming a primary prop of all shutterbugs. With a GoPro camera, you can photograph anything: from scuba diving, and surfing to snowboarding and biking. The specific feature of the GoPro is that it’s possible to fixate it to any surface, which allows production of epic videos of adrenaline activities.
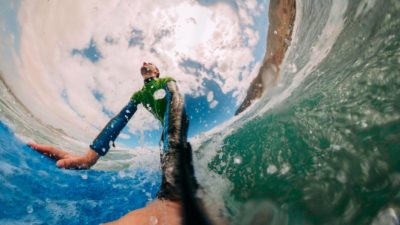
Although its specs could require a more massive camera body, the ratio of performance to dimensions is ideal. You can mount the camera and select settings in a matter of minutes. It incorporates the charm of action cameras which enables recording from impossible angles, but also added the opportunity to record in almost all weather, terrain and natural conditions.
Choose the Best Lighting
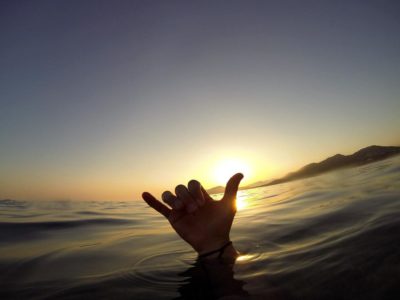
If you want to catch the best possible lighting for your GoPro photos, you should shoot during sunrise or sunset – midday is the worst time of day for shooting. If you take photos around sunrise, you will achieve softer, cool photographs.
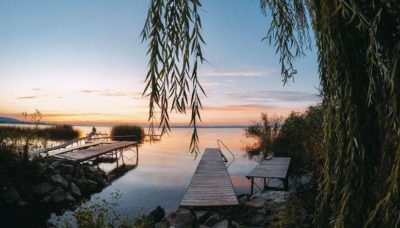
On the other hand, taking pictures around sunset will give you gold lighting with a stronger glow.
Lighting plays a huge role in your GoPro photos, just like in all other photography modes.
Play Around with the Settings
One of the best perks of shooting with GoPro is that you can access a number of settings and customize them to achieve a different effect every time. For example, if you have a Hero5 GoPro, you can shoot in RAW mode (also called Native in Hero4) in order to capture more details than you normally would if you used the default settings of GoPro. Another great setting to play around with is white balance. The default GoPro white balance set automatically works awesome, but you can achieve different effects by tweaking this a bit in different circumstances.
You can adjust white balance settings according to different lightings you’re in:
- RAW and NATIVE mode – will shoot a detailed, clear image that will appear to be less processed. This mode is a great basis for further editing.
- 3000k – when you’re shooting in sunrise, sunset or artificial light (warm light white balance)
- 5500k – when you’re shooting in broad daylight and outdoors when the weather is clear (semi-cool light white balance)
- 6500k – when you’re taking photos indoors with fluorescent lighting or outside when it’s cloudy (cool light white balance)
Try Different Compositions
- Shoot a straight horizon – a crooked horizon perspective can be anything from confusing to downright annoying to the human eye.
- Play with foreground – instead of only focusing on the background of your image, try and catch some of the foreground in front of it. This will give the photo depth and a fresh, interesting perspective.
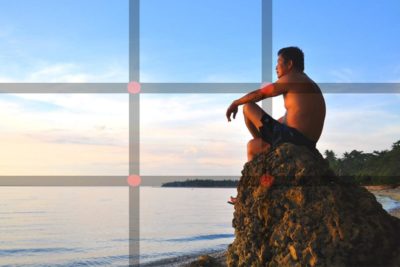
- Mind the thirds – in photography, there’s the so-called rule of thirds, which says that you can break up your scene in three horizontal and three vertical thirds to make composition easier. Sky should be in the top third, a horizon in the middle third, and your foreground in the bottom third.
- Get closer – if you play around with how close you are to your focus object, you can achieve radically different results. Don’t be afraid to get closer and see what kind of shot you can get.
Try Different Shutter Speeds
Another nifty feature of GoPro is that you can try out different shutter speeds to achieve different photo effects and ultimately end up with an epic photo. Shutter speed customization is great if you want to take a photo of light trails or capture starlight in your photos. If you don’t know how to work with shutter speed yet, the easiest way to go about it is to choose the Night-Lapse photo mode in your GoPro, where you can choose a slower shutter speed.
According to your desired effects, you can use the following shutter speed settings to achieve particular results:
- If you want to capture starlight without any other sources of light, in complete darkness, you should set your shutter speed to 30 seconds.
- If you want to take a photo of a moonlight sky while there are other light sources present, the optimal shutter speed would be 20 seconds.
- For capturing night traffic, light painting, and other light trail scenes, you can use shutter speeds of 2-10 seconds.
Use Time-Lapse Mode
When you use the time-lapse mode on your GoPro camera, you will get clearer photos without continually pressing the shutter button. Of course, you can use this mode to take a pic every 2-5 seconds, even if you’re still holding your GoPro. This will give you a higher control of the scene and the composition.
The purpose of this mode, while you’re holding your GoPro, is to reduce the shakiness that’s caused by pressing the shutter. Even the slightest press of your camera button causes the lens to move because of the camera’s high responsiveness. This can result in blurry photos. So, if you want to hold the device in your hand, but not have to press the shutter all the time, the time-lapse mode is the perfect solution.
Conclusion
Mastering GoPro and learning how to take epic photos can take a lot of time. This is definitely an amazing camera which will allow you to take the best action pictures that you’ve ever seen. Still, you can follow some of these tips to take pro-quality GoPro photos even if you are still a beginner. You will quickly learn the ropes and take advantage of all the features GoPro has to offer!
Author/Collaborator:
Donald Fomby is a passionate travel photographer, writer and Vietnamese translation expert at PickWriters to clients around the world. He’s an adrenaline junkie who’s on the road most of the time with his fiancee and their two dogs.