For a while now, Sparksight’s Lead Animator, Ryan Austin, and I have been trying to find a way to do an animation with a retro, pixel-art style. Not only has nobody gone for it, we haven’t found a way to quickly create anything that looks pixelated with any real control. I recently spent some time trying to find an efficient way to create pixel bit characters in Adobe Illustrator by making characters for my favorite podcasters and D-List Internet celebrities, the guys over at Kinda Funny. I finally found something that actually works! I drew pretty heavily from Scott Pilgrim vs. The World: The Game to try and get the look down. You might as well consider this a tutorial on how to make your own Scott Pilgrim characters. Check out my method below!
Step 1: Decide the size of the image you will be creating
I typically work at a scale of 10×10 pixels for each “pixel.” It doesn’t result in true 8- or 16- bit graphics, but it gives you a lot more flexibility in the amount of detail and final look of your image. Say you want your character to be 50 “pixels” wide by 75 “pixels” high, you need to create a shape that is 500 pixels wide by 750 pixels tall. Use the rectangle tool (M) to create this shape. Click once to bring up a window and type in the exact height and width you desire. Center it on your artboard and you are ready for the next step.

Step 2: Split your shape into the grid you will paint to achieve the pixelized look
Select your shape and navigate to Object > Path > Split Into Grid. A dialog box will open prompting you to decide how many rows and columns you need. Simply divide the height and width of your shape by 10 and create that many rows and columns. For my design, that is 75 rows and 50 columns. Select everything and group it (CRTL+A and CRTL+G). It may be helpful to duplicate this selection, I’ve found the best way is (CRTL+C and CRTL+F). Take this selection and navigate to View > Guides > Make Guides. This should make it a bit easier (no pun intended) to see each pixel you will have to work with. Voila! On to painting!

Step 3: Convert each square to a field that can be quickly and dynamically filled with the Live Paint Bucket (K)
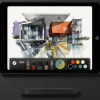
To do this, select your desired grouped boxes and navigate to Object > Live Paint > Make. You can essentially use the Live Paint Bucket (K) tool to draw your characters, dragging across the artboard to fill each square. Quickly cycle between the colors in your swatches panel with the arrow keys and you are off to the races.

Check out some of my characters below!


Once you create pixel bit characters in Adobe Illustrator, have some fun with it by creating run, punch, or idle cycle GIFs like I did above. Draw and export each pose as an image and combine them in Adobe Photoshop or bring your AI file into Adobe After Effects and follow the steps outlined in my How to Create Animated GIFs For Your Website blog post. Have fun!


Nice tutorial I have been using illustrator for animated video maker but now I need to make sprites through illustrator this is so helpful article.
Happy to help Jeff! Let us know how it went!
I’m having an issue with the third step. The live pain feature doesn’t allow me to make after I select all the lines :/
Hi Scott, “Make” should be an option after you select every tile once you’ve split into a grid. Hope that helps!
How do you remove the grid once you are done creating the image?
Hi Brian! Nice tutorial, i was wondering if you know what size would be best for a smartphone videogame.
Thanks for the great ideas! But how do you get rid of the grid? I changed it to invisible, but lines still show up when I pull the file into After Effects. Thanks!
Thanks for the awesome tutorial! Used it for a lyric video I edited last year! https://www.youtube.com/watch?v=vpkIvHdYXr4
Hi Jamar, Delighted to hear our blog post was of use to you 🙂
Hi wondering if you save as any certain file type? Not sure what to do there.
Hi Lula, the PNG file format let’s you have transparency in your image which can be helpful for creating animated GIFs. We have another blog post here showing how you could make this illustration animated. How to Create Animated GIFs
It’s very difficult to make moving mustache for me I tried many time character almost final but need some more help from you could please tell me how can i add this in pixel character Thankyou
Hi Jeanne,
At the bottom of the blog we showed some other characters we created with facial hair drawn on. Another great example of a pixel mustache is 8-bit Mario and Luigi! If you search for “Pixel Mustache” on Google Images, you can see some examples of how to style a mustache on your character and then continue to animate your character as usual. Let us know if you need some more help!
Hello,
I am following the steps and it seems that when you convert the path into guides it no longer allows you to “make” under live paint. If you do not convert the path to guides, it leaves the grid on the finished image. Any suggestions?
Hi Jay,
Here is a link to some helpful tips from Adobe on using grids and guides. I hope this helps! https://helpx.adobe.com/illustrator/using/rulers-grids-guides-crop-marks.html
I have read your article is too late nowadays adobe animated, character animation is easier to generate like this but you deliver dam detail knowledge wonderfully